Timesheet Overview
Individual timesheets enable you to enter time spent on particular
activities and plan your time-off. General timecodes are added by default.
For more information on specific timecodes that apply to you, contact your direct manager or
engagement leader.
| Callout | Element | Description |
|---|---|---|
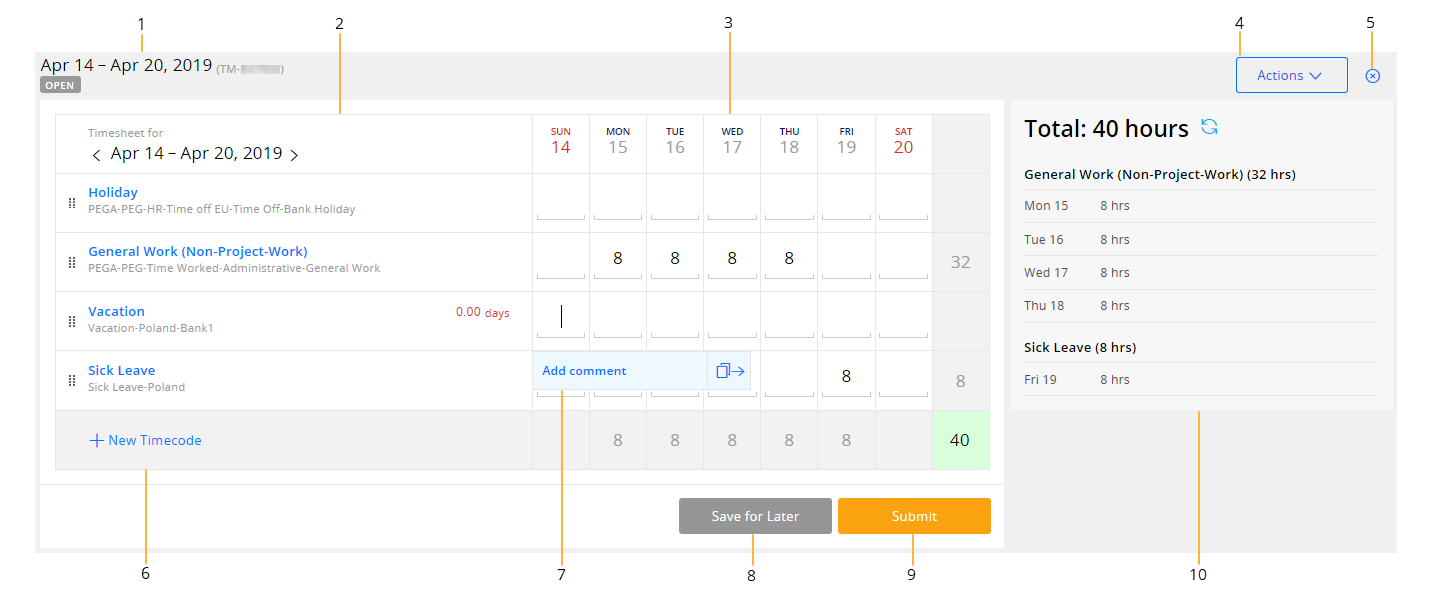
| 1 | Status indicators | Display the timesheet status, week that you enter time for, and timesheet ID. You can quickly access a given timesheet by entering its ID in the Search field. |
| 2 | Week panel | Displays the week that you enter time for. Enables you to switch
between timesheets by using the |
| 3 | Calendar panel | Enables you to enter time against specific timecodes. Displays cumulative information about your time spent on particular activities. |
| 4 | Actions button | Enables you to copy the values from the previous timesheet to the current timesheet, access the timesheet history, manage attachments, and add new timecodes. |
| 5 | Close button | Brings you back to the Timesheets Home page. |
| 6 | New Timecode button | Enables you to add timecodes. You can customize your timecodes by assigning them personal nicknames. |
| 7 | Comment dialog box | Enables you to comment a particular value. You must comment
billable hours. Entering comments for non-billable hours is
optional. Also, enables you to quickly copy a value to the following
cell by using the  icon. icon. |
| 8 | Save for Later button | Saves the timesheet for later. It is useful if the timesheet is not completed yet. |
| 9 | Submit button | Submits the timesheet for your manager's approval. |
| 10 | Summary panel | Summarizes the values that you entered in the timesheet. |