Entering Time
You can either submit timesheets for your manager's approval or save them
for later. If you are a delegate, you can also submit timesheets on behalf
of another Pega employee.
Ensure that you added all applicable timecodes. See Adding Timecodes.
-
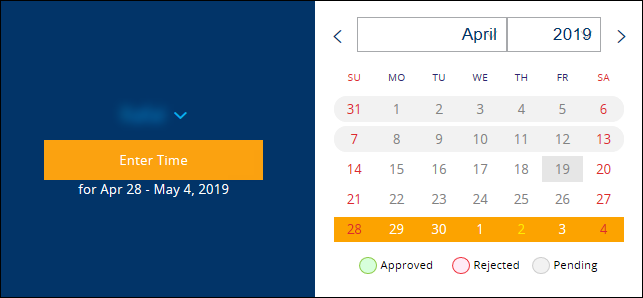
On the Timesheets Home page, in the
Calendar panel, perform the following actions:

-
If you want to enter your time, ensure that your
Name
 is
selected.
-
If you want to enter time as a delegate, click Name
 and
select the appropriate person.
-
Select the timesheet for which you want to enter time.
The timesheet cannot be Approved, Rejected, or Pending.
- Click Enter Time.
-
If prompted, click the action link.

-
If you want to enter your time, ensure that your
Name
- Optional:
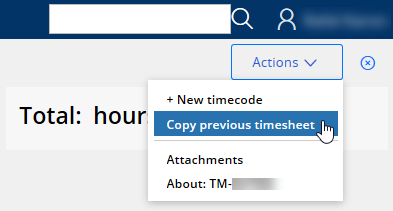
Copy the timesheet values from the previous week by clicking
Actions and selecting Copy previous
timesheet.
 The timesheet populates with editable values.
 -
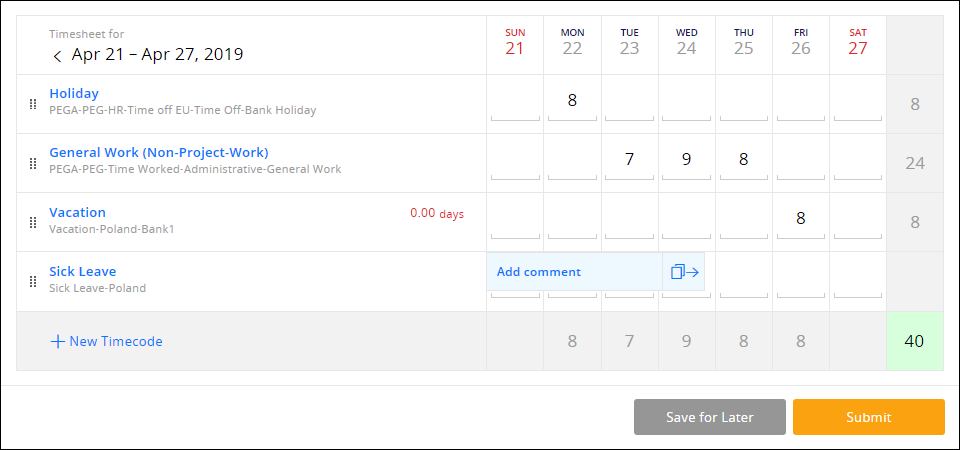
Fill in the calendar fields that correspond to the appropriate timecodes.
Important: Numerals correspond to full hours. If required, you can enter time in quarter-hour increments, for example: 1, 1.25, 1.5, 1.75. If you enter billable time, you may be restricted to enter time for some project-specific timecodes within a given time frame.

- Optional:
Copy a calendar field value to the following field by selecting the value and
clicking
 .
.

-
Add comments by performing the following actions:
Important: You must add comments for billable hours. The comments that you add for billable hours are visible on the invoices sent to Pega customers. Entering comments for non-billable hours is optional.
- Select the appropriate field and click Add comment.
- In the Comment dialog box, type in your comment.
- If needed, from the Project Role drop-down list, select the appropriate value.
- Click OK.
-
If you enter billable time, under Work locations,
perform the following actions:
 Note: The Work locations section specifies the places where you performed your work in a given time frame.
- Set the billable time frame by selecting dates from the From day and Till day drop-down lists.
- Set the work location by selecting the values from the Country and Location drop-down lists.
- If needed, click New work location and repeat 6.
-
If needed, add attachments by performing the following actions:
Note: You may need to submit the documents certifying time that you entered for some activities. For more information, contact your direct manager.
- Click Actions and select Attachments.
- In the window that appears, click Add, select a relevant option, and follow on-screen instructions.
- Click OK and click Close.
-
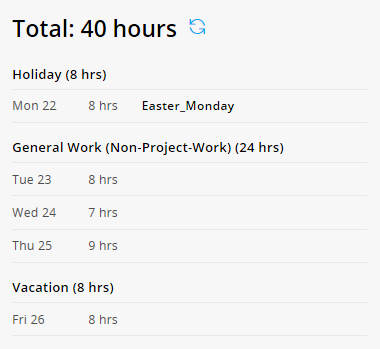
Ensure that you entered time correctly by referring to the
Summary panel. If needed, correct the values.

-
Perform one of the following actions:
- If you want to save a draft version of the timesheet, click Save for Later.
- If you want to submit the timesheet for your manager's approval, click Submit.
- If prompted, click OK.